


Discover ways to set up the GRR (Google Speedy Response) server and shopper on Ubuntu to run instigations.
Introduction
GRR (Google Speedy Response) is a Python-based incident response framework that can be utilized for dwell forensics and investigations. It permits you to conduct distant investigations and assaults and analytics.
GRR will be deployed in a server-client structure. It comes with a web-based person interface that permits you to analyze knowledge collected from the shoppers. It offers help for Linux, Mac OS X and Home windows OS.
Necessities
- A server operating Ubuntu 18.xx
- A root password has been set in your server
To work
Earlier than you start, you need to replace your system with the most recent model. You are able to do this by operating the next command:
apt-get replace -yAfter your system is up to date, reboot the system to use all adjustments.
Set up and configure database
First it’s worthwhile to set up the MariaDB database server in your system. You may set up it with the next command:
apt-get set up mariadb-server -yAfter the set up is full, safe the MariaDB set up by operating the next command:
mysql_secure_installationReply all questions as proven beneath:
Enter present password for root (enter for none):
Set root password? [Y/n]: N
Take away nameless customers? [Y/n]: Y
Disallow root login remotely? [Y/n]: Y
Take away take a look at database and entry to it? [Y/n]: Y
Reload privilege tables now? [Y/n]: Y
As soon as the MariaDB is secured, login to the MariaDB shell with the next command:
mysql -u root -pEnter your root password. Then create a database and person for GRR with the next command:
MariaDB [(none)]> CREATE DATABASE grr;
MariaDB [(none)]> GRANT ALL PRIVILEGES ON grr.* TO 'grr'@'localhost' IDENTIFIED BY 'password' WITH GRANT OPTION;
Then flush the privileges and exit the MariaDB shell with the next command:
MariaDB [(none)]> FLUSH PRIVILEGES;
MariaDB [(none)]> EXIT;
Then restart the MariaDB service with the next command:
systemctl restart mariadbYou may examine the standing of the MariaDB service with the next command:
systemctl standing mariadbYou must see the next output:
mariadb.service - MariaDB 10.1.38 database server
Loaded: loaded (/lib/systemd/system/mariadb.service; enabled; vendor preset: enabled)
Energetic: energetic (operating) since Fri 2019-04-12 15:11:14 UTC; 54min in the past
Docs: man:mysqld(8)
https://mariadb.com/kb/en/library/systemd/
Important PID: 1050 (mysqld)
Standing: "Taking your SQL requests now..."
Duties: 46 (restrict: 1113)
CGroup: /system.slice/mariadb.service
└─1050 /usr/sbin/mysqld
Apr 12 15:10:53 ubuntu1804 systemd[1]: Beginning MariaDB 10.1.38 database server...
Apr 12 15:11:07 ubuntu1804 mysqld[1050]: 2019-04-12 15:11:07 140152311749760 [Note] /usr/sbin/mysqld (mysqld 10.1.38-MariaDB-0ubuntu0.18.04.1)
Apr 12 15:11:14 ubuntu1804 systemd[1]: Began MariaDB 10.1.38 database server.
Apr 12 15:11:14 ubuntu1804 /and many others/mysql/debian-start[1251]: Upgrading MySQL tables if mandatory.
Apr 12 15:11:15 ubuntu1804 /and many others/mysql/debian-start[1265]: /usr/bin/mysql_upgrade: the '--basedir' choice is all the time ignored
Apr 12 15:11:15 ubuntu1804 /and many others/mysql/debian-start[1265]: Searching for 'mysql' as: /usr/bin/mysql
Apr 12 15:11:15 ubuntu1804 /and many others/mysql/debian-start[1265]: Searching for 'mysqlcheck' as: /usr/bin/mysqlcheck
Apr 12 15:11:15 ubuntu1804 /and many others/mysql/debian-start[1265]: This set up of MySQL is already upgraded to 10.1.38-MariaDB, use --force should you
Apr 12 15:11:15 ubuntu1804 /and many others/mysql/debian-start[1306]: Checking for insecure root accounts.
Apr 12 15:11:15 ubuntu1804 /and many others/mysql/debian-start[1311]: Triggering myisam-recover for all MyISAM tables and aria-recover for all Aria tables
traces 1-21/21 (END)
After getting achieved this, you may proceed to the subsequent step.
Set up the GRR server
First it’s worthwhile to obtain a GRR bundle from their official GitHub repository.
You may obtain it with the next command to obtain the GRR 3.2.4.6 model.
wget https://storage.googleapis.com/releases.grr-response.com/grr-server_3.2.4-6_amd64.debAs soon as the obtain is full, you may set up the downloaded file with the next command:
dpkg -i grr-server_3.2.4-6_amd64.debThen set up the required dependencies with the next command:
apt-get set up -fThroughout set up, it’s worthwhile to present some particulars reminiscent of database host, username, password, GRR URLs and admin password as proven beneath:
Working grr_config_updater initialize
To keep away from this prompting, set DEBIAN_FRONTEND=noninteractive
#################################################################
Checking write entry on config /and many others/grr//server.native.yaml
Step 0: Importing Configuration from earlier set up.
No outdated config file discovered.
Step 1: Setting Primary Configuration Parameters
We are actually going to configure the server utilizing a bunch of questions.-=GRR Datastore=-For GRR to work every GRR server has to have the ability to talk withthe datastore. To do that we have to configure a datastore.GRR will use MySQL as its database backend. Enter connection particulars:MySQL Host [localhost]:MySQL Port (0 for native socket) [0]:MySQL Database [grr]:MySQL Username [root]: grrPlease enter password for database person grr:Efficiently related to MySQL with the offered particulars.-=GRR URLs=-For GRR to work every shopper has to have the ability to talk with theserver. To do that we usually want a public dns identify or IP addressto talk with. In the usual configuration this might be usedto host each the shopper dealing with server and the admin person interface.Please enter your hostname e.g. grr.instance.com [ubuntu1804]: 192.168.0.104-=Server URL=-The Server URL specifies the URL that the shoppers will join tocommunicate with the server. For greatest outcomes this needs to be publiclyaccessible. By default this might be port 8080 with the URL ending in /management.Frontend URL [http://192.168.0.104:8080/]:-=AdminUI URL=-:The UI URL specifies the place the Administrative Net Interface will be discovered.AdminUI URL [http://192.168.0.104:8000]:-=GRR Emails=-GRR wants to have the ability to ship emails for numerous logging andalerting features. The e-mail area might be appended to GRRusernames when sending emails to customers.-=Monitoring/E mail Area=-Emails regarding alerts or updates have to be despatched to this area.E mail Area e.g instance.com [localhost]:-=Alert E mail Deal with=-Deal with the place monitoring occasions get despatched, e.g. crashed shoppers,damaged server, and many others.Alert E mail Deal with [grr-monitoring@localhost]:-=Emergency E mail Deal with=-Deal with the place excessive precedence occasions reminiscent of an emergency ACL bypass are despatched.Emergency Entry E mail Deal with [grr-emergency@localhost]:Rekall is now not actively supported. Allow anyway? [yN]: [N]:Step 2: Key GenerationAll keys could have a bit size of 2048.Producing executable signing keyGenerating CA keysGenerating Server keysGenerating secret key for csrf safety.Repacked into /usr/share/grr-server/executables/installers/grr_3.2.4.6_amd64.debGRR Initialization full! You may edit the brand new configuration in /and many others/grr//server.native.yaml.Please restart the service for the brand new configuration to take impact.#################################################################Set up full.
Now restart the GRR service to use all adjustments:
systemctl restart grr-serverNow you can examine the standing of GRR with the next command:
systemctl standing grr-serverYou must see the next output:
grr-server.service - GRR Service
Loaded: loaded (/lib/systemd/system/grr-server.service; enabled; vendor preset: enabled)
Energetic: energetic (exited) since Fri 2019-04-12 15:57:09 UTC; 6s in the past
Docs: https://github.com/google/grr
Course of: 7178 ExecStop=/bin/systemctl --no-block cease grr-server@admin_ui.service [email protected] [email protected] grr-s
Course of: 7215 ExecStart=/bin/systemctl --no-block begin grr-server@admin_ui.service [email protected] [email protected] grr
Important PID: 7215 (code=exited, standing=0/SUCCESS)
Apr 12 15:57:09 ubuntu1804 systemd[1]: Beginning GRR Service...
Apr 12 15:57:09 ubuntu1804 systemd[1]: Began GRR Service.
Entry the GRR net interface
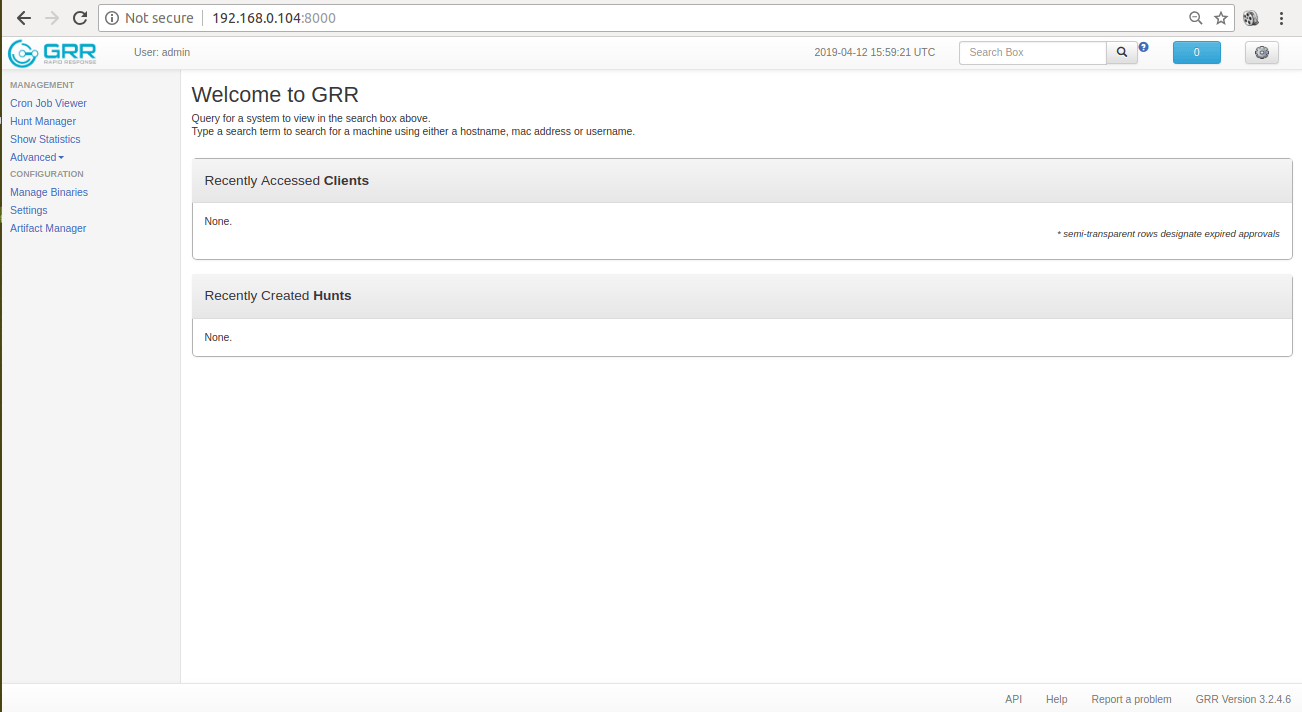
GRR is now put in and listening on port 8000 (Admin) and 8080 (Frontend).
To entry the GRR Admin interface, open your net browser and kind the URL http://192.168.0.104:8000.
You can be prompted to enter the administrator username and password, use admin because the person and password you set throughout set up. Then click on the OK button. You can be redirected to the next web page:
Set up the GRR shopper
First, login to your GRR server’s net interface and navigate to the Handle Binaries tab within the left pane. You must see the totally different shopper variations like RHEL, Debian and BSD on the next web page:

Now your distro is Ubuntu 18.04. So click on on the grr_3.2.4.6_amd64.deb to obtain the GRR shopper for Ubuntu.
As soon as the obtain is full, set up the downloaded file with the next command:
dpkg -i grr_3.2.4.6_amd64.debThe above command installs the GRR shopper in your system and routinely registers itself with the GRR server.
You may also examine the standing of GRR with the next command:
systemctl standing grrYou must see the next output:
grr.service - grr linux amd64Loaded: loaded (/lib/systemd/system/grr.service; enabled; vendor preset: enabled)Energetic: energetic (operating) since Fri 2019-04-12 16:24:39 UTC; 16s agoMain PID: 3305 (grrd)Duties: 6 (restrict: 847)CGroup: /system.slice/grr.service├─3305 /usr/sbin/grrd --config=/usr/lib/grr/grr_3.2.4.6_amd64/grrd.yaml└─3306 /usr/sbin/grrd --config=/usr/lib/grr/grr_3.2.4.6_amd64/grrd.yamlApr 12 16:24:39 ubuntu1804 systemd[1]: Began grr linux amd64.Conducting analysis
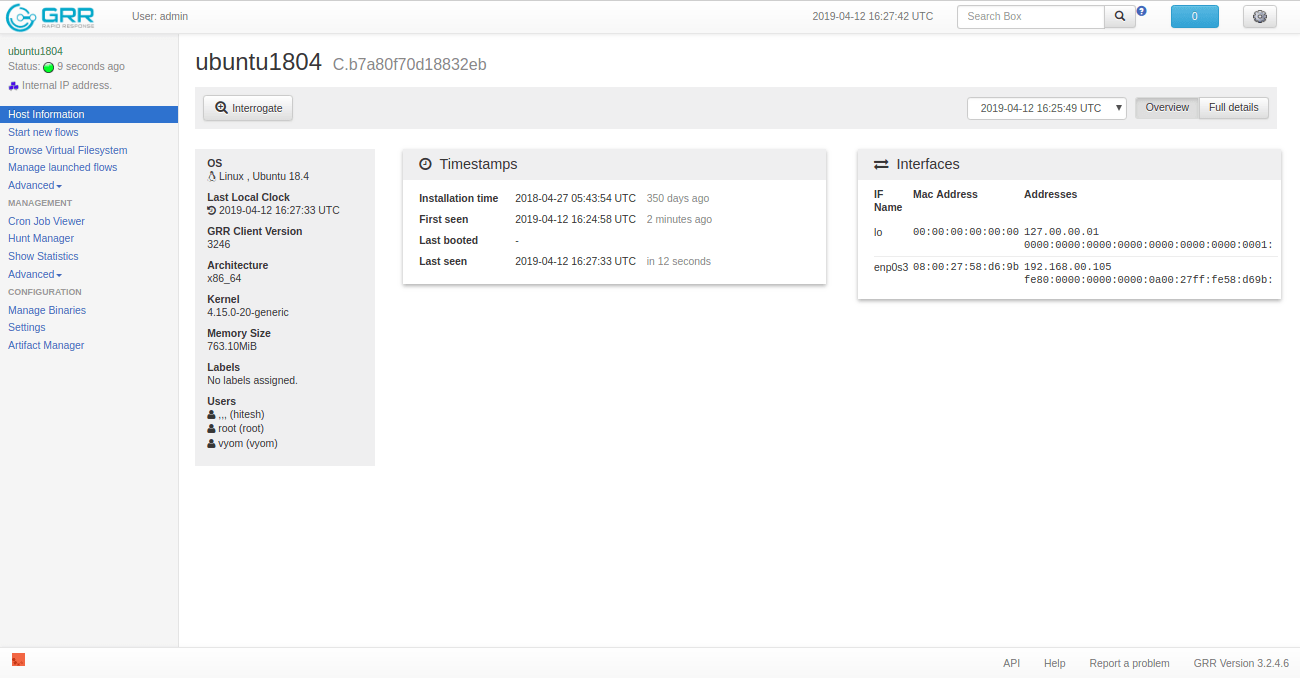
Now go to GRR server net interface, click on on the Search field and press Enter. You must see your buyer on the next web page:

Now click on in your buyer to see extra particulars, as proven on the next web page:
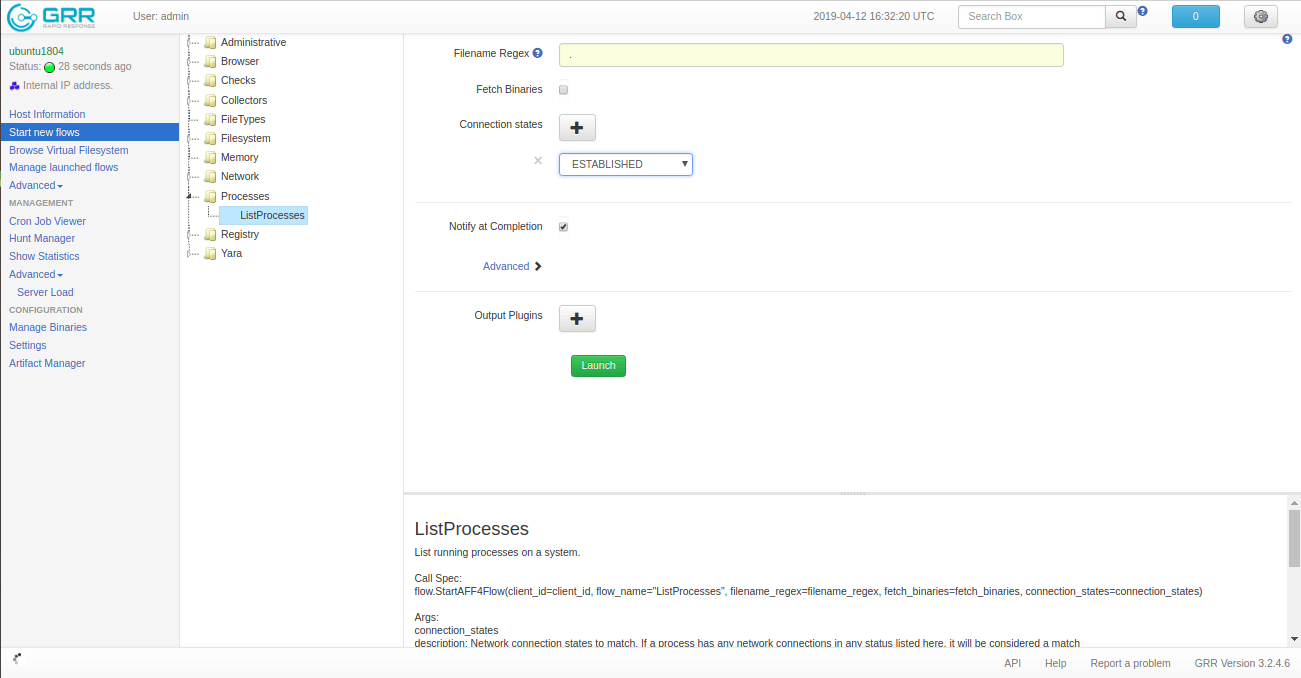
Subsequent, we are going to checklist the processes operating on the shopper.
Click on for this Begin New Flows > Processes > ListProcessesChoose underneath Connection Standing Established and click on the Launch to begin the present. You must see the next web page:
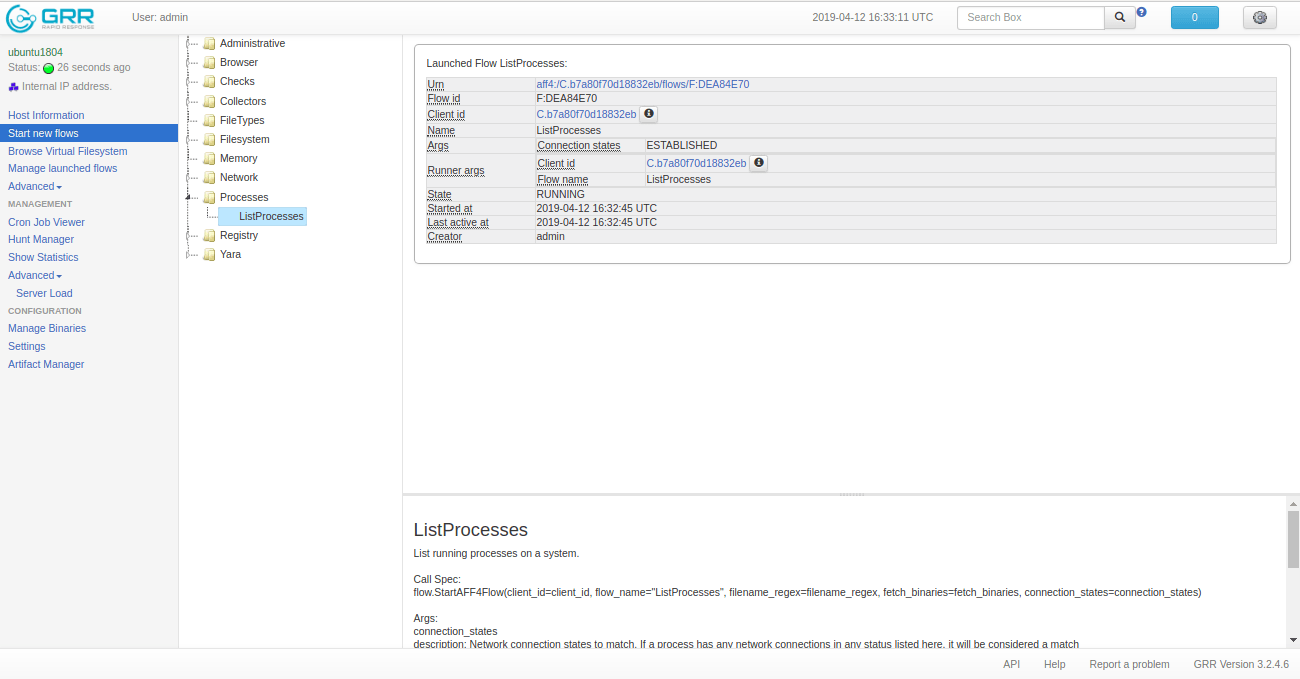
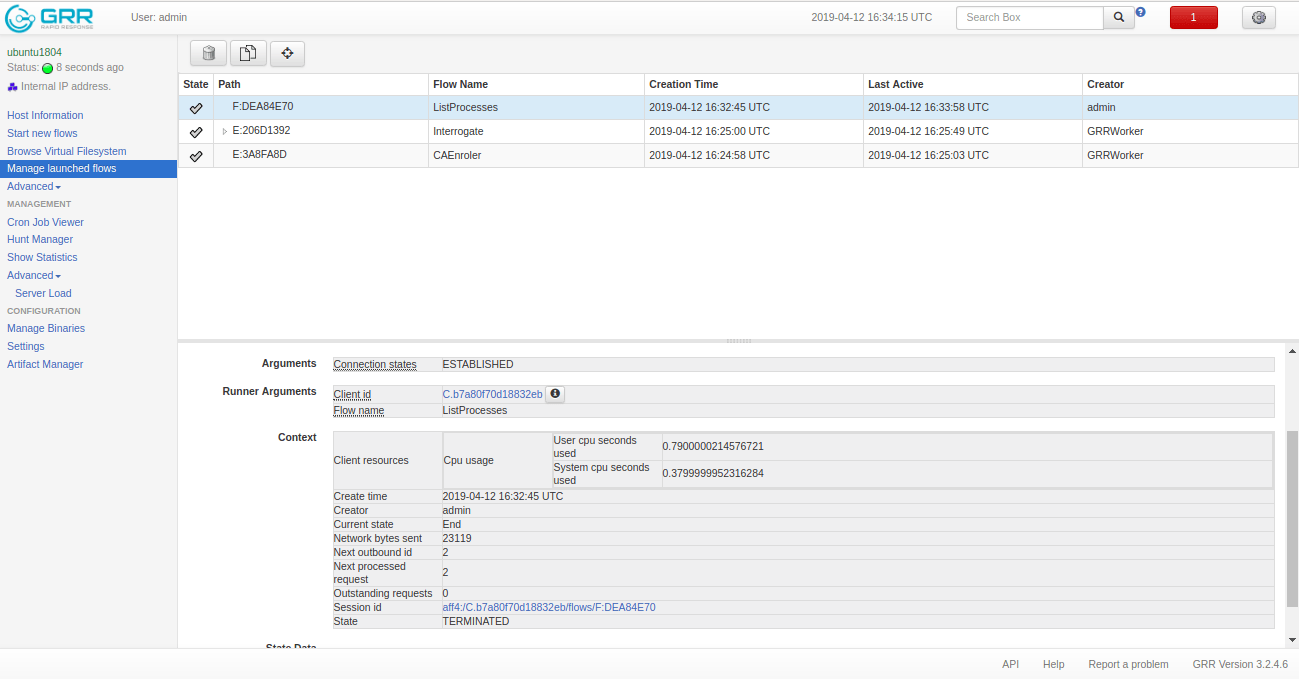
Then click on on the Handle Began Flows > ListProcesses > Outcomes to view the outcomes of the ListProcesses move on the next web page:
Congratulations! You’ve efficiently put in the GRR server and shopper. Go forward and play with the instrument.